Tuesday, November 27, 2012

Yellow and Navy Wedding Centerpieces

A few weeks ago, Isaac and I made our way to Billings.  We were meeting my Baker Bride to look for bridesmaid dresses and so I could show her some mock up designs for her Yellow and Navy wedding.  She had told me she liked paper lanterns, the vases with lemons, and she had designed a monogram that she wanted tied into different aspects of the wedding. 
I came up with a square based design, a bubble vase design, and a cylinder design.  For some reason the cylinder vase photos didn't turn out.  Since this wasn't the final centerpiece, we put them together and she had to use her imagination a little, same way that you'll have to.
 
This is the square design.  Ignore the water bottle.  In the actual centerpiece that will be cut down to put bouquets in.  The flowers would be lower and close to the top of the vase...I just didn't want to cut the stem down and didn't fold it enough.  The flowers will be full enough that from the center they will cover the top of the vase pretty well.
  
She had found an embroidered table runner online that she liked so I used a navy curtain to show what color underneath would look like. She had also thought of navy table cloths but has decided on solid table runners. The lanterns simulate what they will look like at the venue.

This is the bubble or round vase.  You can see two different size votive holders,  I had found a "tealight" holder and a bigger actual votive holder so she could decide what size she wanted.  At her reception, she'll have 3 colors of lanterns (the third is hidden...but she didn't go with the third color in this anyways).  They will be spaced out all along the ceiling so they will also be higher.
  This is an idea of how far apart the lanterns will actually be.  Try to ignore the background...did the test measurements at the house.

The cylinder vase looked similar to these, just the different shape.  She chose to have the lemons submerged in water to bring out the color a little more and as it allowed her to purchase slightly smaller vases (she went with square).  I showed her the cut option, but the color isn't as bright so it didn't have the same look she was going for.

So Many Pictures and So Many Firsts

Isaac has been busy enjoying a lot of new things and experiencing a lot of firsts. 

He got to play in his very own pile of leaves.

He started standing up in his crib so his bed got lowered.


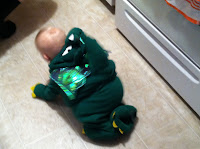
He expereinced his first Halloween costume.
He was a little dragon for Halloween.

The costume wasn't his favorite because he doesn't like things on his head.

He got to help mom hand out candy.  He is social and liked seeing all the kids coming.
Isaac also started climbing on his toy box.  He hasn't climbed onto the couch yet, but it is only a matter of time.
He got to play in the snow for the first time after
the first blizzard of the season.

 
He got to switch to his front-facing car seat. 
Now he can watch mom drive or look out the window. 
He, of course, still sleeps most of the trip when we go any place.
 

He got to help daddy drive up Oma's driveway.  He wasn't as into
it as we thought he would be.
 
 
At Oma's he got to go for a wagon ride. 
Not only was it is first wagon ride,
but it he got to see his first bonfire.

Isaac has fun with these firsts and he has many more coming.  We have lots planned for the upcoming holiday season and for his first birthday, coming up in January.


We're Back!

It has been a while since I posted...oops.  Isaac and I have been busy, busy, busy!!!  My parents came to town, then the little guy got sick, then we went out of town to show my Baker Bride some mock-ups, then I got sick, then we went to Oma's for Thanksgiving.  Wow!!  Well, I have a few posts coming. First up, our Halloween brownies!

I found the brownie recipe online at All Recipes.  They call it Brownie III....I'm just calling them Brownies.  I searched for the recipe because I didn't want a box brownie and wanted one that used cocoa powder rather than baking chocolate.

So...Ingredients: 4 eggs,

This is what the mixture will look like. 
It looked very different from what I expected. 
It didn't stick to the edge of the bowl and is fairly thick.
Directions:
  1. Preheat oven to 350 degrees F (175 degrees C). Grease a 9x13 inch baking pan.
  2. In a large bowl, beat the eggs and vegetable oil together until well blended. Combine the flour, sugar, cocoa powder, baking powder and salt; stir into the egg mixture.
  3. Spread evenly into the prepared pan.
  4. Bake in the preheated oven for 20 to 25 minutes, or until a toothpick inserted into the center of the brownies comes out clean.


Isaac decided to help me out and had is very own mixing spoon.
After the brownies were done, I used Peanut Butter Frosting on them.  I got the recipe from Fun Stuff Cupcakes...a cupcake recipe book I got a few years ago.

Ingredients: 3/4 cup creamy peanut butter (I've made it with crunchy before and it works just fine), 1/2 cup butter (softened), 2 cups powdered sugar, 1/2 teaspoon vanilla, 1/4 cup milk

Directions:
  1. Beat peanut butter and butter in medium bowl about 2 minutes or until creamy.  It is best to use an electric mixer...I use my Kitchen Aide.
  2. Add sugar and vanilla, beat on low until crumbly.  Be careful, powdered sugar can be messier than flour if you start mixing too quickly, too soon.
  3. Slowly add the milk, beat slowly until creamy.  If you have extra milk, or need a little more to make sure it is creamy then don't worry.
I added orange sprinkles...sadly they are hard to see.  I also added some chocolate chips and peanut butter chips that I had left over.  We ate these while we handed out Halloween candy.


The finished product!

Saturday, November 3, 2012

Slippery Socks

Isaac has big feet.  So his grandma got him some new socks, some that fit just right and some that are too big but that will fit better soon.  The only issue is that most of them didn't have the no-slip bottoms.  Our house is mostly carpet, except for the kitchen and Isaac's room.  When we started putting him in the socks, I noticed he would slip a little if he tried to pull himself up but not too bad.

Then, last week we went to visit family who had no carpet, just area rugs in their house.  He was in his socks and just kept slipping, then of course his leg would go under the furniture and he didn't know how to free himself.


 Isaac has started pulling himself up on furniture more and more and has started walking along the furniture. It seems as though he only crawls to get to the next piece, if it is too far away to transfer.
 So, I decided that the socks needed to have no-slip bottoms.  Rather than getting new socks, I came up with a way to do it myself.  I used puffy paint (98 cents at Wal-Mart) rather than hot glue (my original idea) because I don't have a hot glue gun and our tiny Wal-Mart didn't have one (at least that I could find.)
 
First, I gathered all the socks that needed sticky bottoms and my puffy paint.  I chose to use black, but whatever color you choose will work.

 
Then I flattened out the bottoms.  No worries if it isn't perfect, it is just easier to apply the paint this way.  If you tuck the heel of the sock in, they will flatten out nicely.

 
Then...I went to town!  I did zig-zags on most of them because it was easier.  I tried to keep to the middle of the sock, but as long as it is on the bottom it will be fine.

 
I tried dots on one pair, but they took longer and I didn't think one way would work better than the other.  The dots also tend to stick up more than the zig-zag so if you are worried about them drying quickly that will be something to consider.

 
My puffy paint would randomly send out a big glob...I just tried to spread it out a bit.  It is the bottom of the sock so it won't be seen much.  Sorry about the blurry photo, Isaac was trying to help and my camera wasn't very appreciative.
 
So far the socks are working out really well, but the true test will be when we visit relatives that have less carpeting than we do...or when he dares to take a step without the assistance of furniture.